Request Your Estimate Today
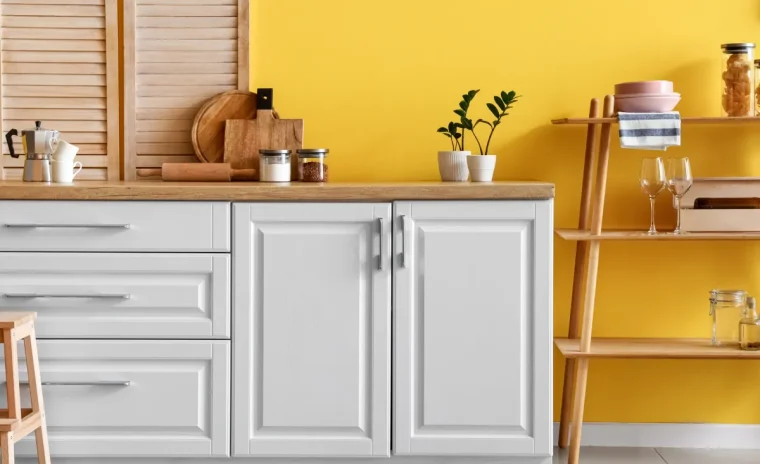
Assessing Cabinet Condition and Preparing Your Workspace
Before purchasing a single supply, evaluate the current state of your cabinets. The existing finish determines whether you’ll need light surface preparation or extensive stripping. Solid wood cabinets in good structural condition are ideal candidates for refinishing, while laminate or thermofoil surfaces require specialized primers and may not yield the same durability. Check for delamination, water damage near the sink area, and loose joints that need repair before any paint touches the surface.
In Tallahassee homes, years of humidity exposure often leave cabinet surfaces with a subtle film of cooking oils and moisture residue that standard cleaners miss. We recommend a thorough degreasing process using trisodium phosphate (TSP) or a TSP substitute mixed according to manufacturer instructions. Work in sections, scrubbing every surface including the interior edges of door frames where grease accumulates. Rinse thoroughly with clean water and allow at least 24 hours of drying time. Florida’s ambient humidity means surfaces that feel dry to the touch may still hold moisture that will prevent proper paint adhesion.
Remove all cabinet doors, drawer fronts, and hardware before starting. Label each piece with painter’s tape on the back, noting its original location (upper left, lower right, etc.) to simplify reinstallation. Store hardware in labeled bags. This level of organization prevents the frustration of mismatched doors during reassembly and ensures a smooth workflow throughout the project.
Prepare your workspace with proper ventilation and climate control. Tallahassee’s summer temperatures and high humidity create challenging conditions for paint application and drying. If possible, set up a painting area in a climate-controlled garage or spare room where you can maintain temperatures between 65 and 75 degrees Fahrenheit with relative humidity below 50 percent. Elevated humidity levels extend drying times and increase the risk of dust particles settling into wet paint, compromising the professional finish you’re working to achieve.
Proper Sanding and Priming for Lasting Adhesion
Sanding creates the mechanical bond that allows primer and paint to grip the existing finish. Use 120-grit sandpaper for your initial pass on previously finished cabinets, working in the direction of the wood grain to avoid visible cross-grain scratches. The goal is not to remove the old finish entirely but to roughen the surface enough that the primer can establish a secure connection. On flat panels, a random orbital sander speeds the process while maintaining consistent results. For detailed areas, door frames, and routed edges, hand sanding with a sanding block gives better control.
After the initial sanding, vacuum all surfaces and wipe down with a tack cloth to remove every trace of sanding dust. Any residual dust becomes a texture defect in your final finish. Pay particular attention to routed details and panel edges where dust settles and hides. In our experience working throughout Tallahassee, skipping this cleaning step is one of the most common causes of rough, unprofessional cabinet finishes.
Primer selection determines whether your finish lasts two years or twenty. For cabinets with existing oil-based finishes or wood species prone to tannin bleed-through (oak, cherry, pine), use a high-quality shellac-based or oil-based primer. Water-based primers offer easier cleanup and lower odor, but they lack the blocking power needed for challenging surfaces. Apply primer in thin, even coats using a high-quality synthetic brush for detailed areas and a foam roller for flat panels. Avoid the temptation to achieve full coverage in one heavy coat; two thin coats deliver superior adhesion and a smoother surface.
Allow the primer to cure fully according to the manufacturer’s specifications. In Tallahassee’s humid climate, add at least four hours to the recommended drying time before proceeding to sanding. Once the primer is completely dry, sand lightly with 220-grit sandpaper to remove any raised grain or minor imperfections. This step creates the glass-smooth foundation that separates amateur projects from professional results. Wipe clean with a tack cloth before moving to your base coat application.
Selecting the Right Paint and Mastering Application Methods
Cabinet paint selection involves balancing durability, finish quality, and workability. Acrylic-alkyd hybrid paints combine the hardness and leveling properties of traditional oil-based paints with the easy cleanup and low odor of water-based formulas. These products self-level to minimize brush marks and cure to a finish that withstands the daily wear kitchen cabinets endure. Look for paints specifically formulated for cabinets and trim; standard wall paints lack the durability and hardness required for surfaces that face constant contact.
Finish sheen affects both appearance and practicality. Satin and semi-gloss finishes offer the best combination of cleanability and appearance for most kitchens, hiding minor imperfections while providing a surface that wipes clean easily. High-gloss finishes create a dramatic, furniture-like appearance but reveal every surface flaw and require flawless preparation and application technique. In Tallahassee homes where humidity can exacerbate imperfections, we typically recommend a satin finish for a forgiving, professional result.
Application technique determines whether your careful preparation yields a professional finish or a frustrating do-over. Use a high-quality synthetic brush with flagged (split) bristles for all detailed work, including door frames, routed edges, and inside corners. For flat panels, a foam roller creates the smoothest finish with minimal texture. Work in a consistent pattern, maintaining a wet edge to prevent lap marks where dried paint meets wet paint. Apply thin coats; thick coats may appear to provide better coverage initially, but they sag, drip, and take substantially longer to cure properly.
Temperature and humidity control during application cannot be overstated. Paint applied in temperatures above 85 degrees Fahrenheit or in humidity above 70 percent may appear to dry on the surface while remaining soft underneath, leading to a finish that remains tacky or develops texture issues as dust settles. If you must work during Tallahassee’s summer months, start early in the morning when temperatures and humidity levels are at their daily lows, and use fans to maintain air circulation without directing airflow onto wet paint surfaces.
Between coats, inspect your work under strong, angled lighting to identify runs, sags, or missed spots while correction is still possible. Any defects should be sanded smooth once fully dry and touched up before proceeding to the next coat. This quality control step separates adequate results from finishes that rival factory cabinetry.
Finishing Coats and Managing Cure Time in Florida’s Climate
After your base coats have dried, a light sanding with 320-grit sandpaper or fine sanding sponges removes any texture, dust particles, or minor imperfections. This step is non-negotiable for a professional finish. Sand lightly and evenly, then clean thoroughly with a tack cloth. Your final coat of paint goes onto this perfectly smooth surface, and the quality of this preparation shows immediately.
The final coat requires your most careful application. Thin the paint slightly (no more than 5 percent) if recommended by the manufacturer to enhance leveling and reduce brush marks. Work methodically, maintaining a wet edge and avoiding the urge to overwork areas that have begun to set. Once paint begins to tack up, additional brushing creates texture rather than smoothing it. Trust your preparation and application technique; a properly applied thin coat levels itself as it dries.
Drying and curing are not the same process. Paint may feel dry to the touch within hours, but full cure takes days or even weeks depending on the product and environmental conditions. In Tallahassee’s humid climate, extend the manufacturer’s recommended cure time by at least 50 percent before reinstalling doors and returning items to cabinets. Paint that has dried but not cured remains vulnerable to damage from pressure, scratching, and moisture exposure. Handles and knobs should not be installed until at least 72 hours after the final coat, and avoid placing objects on shelves or closing cabinet doors fully for at least one week.
For cabinets that will see heavy use, particularly around the sink and stove, consider a clear topcoat for added protection. Water-based polyurethane formulated for use over paint provides an additional barrier against moisture, heat, and cleaning chemicals without yellowing over time. Apply topcoat only after paint has cured for the full recommended period; applying it too early can cause the underlying paint to wrinkle or soften.
Climate control during the curing period matters as much as during application. Maintain consistent temperature and humidity levels, avoiding the temptation to speed drying with heaters or fans positioned directly on painted surfaces. Rapid drying can cause the surface to cure before the underlying layers, leading to cracking or poor adhesion. Patience during this final stage ensures your investment in time and materials delivers years of beautiful, durable service.
When the project demands precision beyond what time and conditions allow, professional cabinet painting services offer climate-controlled application environments and commercial-grade materials that guarantee results. Whether you complete this project yourself or partner with experienced professionals, understanding these principles ensures you achieve the lasting, beautiful finish your kitchen deserves.
Common Mistakes and How to Avoid Them
The difference between a cabinet finish that lasts five years and one that begins chipping within months often comes down to mistakes made during preparation and application. We’ve seen countless DIY projects in Tallahassee homes that require complete refinishing because homeowners skipped essential steps or attempted shortcuts that seemed harmless at the time.
The most common error is inadequate surface preparation. Many homeowners sand lightly or skip deglossing altogether, assuming modern paints will adhere to any surface. Cabinet surfaces accumulate cooking grease, cleaning product residue, and oils from hands over years of use. Without thorough cleaning using a degreasing agent like trisodium phosphate (TSP) or a TSP substitute, even the best primer will eventually lift. In Florida’s humid climate, where moisture can penetrate weak bonds, this failure happens faster than in drier regions. Always clean cabinets twice, once with a degreaser and again with clean water, before any sanding begins.
Rushing the drying process destroys more cabinet projects than any other single mistake. When temperatures climb into the high eighties and humidity hovers above seventy percent during Tallahassee summers, paint may feel dry to the touch within hours but hasn’t fully cured. Recoating too quickly traps solvents beneath the surface, creating a finish that remains soft and susceptible to damage. Cabinet doors that stick to frames, drawer fronts that show fingerprints weeks after painting, and finishes that never achieve full hardness all stem from impatience during the drying phase. Even when product labels suggest recoat times, extend these periods by at least fifty percent during humid months. A project that takes seven days instead of four will serve you for a decade instead of two years.
Poor ventilation creates multiple problems beyond health concerns. Inadequate airflow extends drying times, increases the likelihood of dust settling into wet finishes, and prevents proper paint curing. We recommend setting up cross-ventilation with fans positioned to move air through the space without blowing directly on wet surfaces, which can cause premature surface drying and texture issues. If your kitchen lacks windows or exterior doors, consider painting cabinets during cooler months when you can open the home more fully, or rent commercial air movers designed for painting projects.
Another frequent mistake involves mixing paint products from different manufacturers or lines. Primers, paints, and topcoats are formulated to work as systems. Using an oil-based primer under water-based paint, or combining a standard latex primer with a specialized cabinet paint, can create adhesion problems or chemical reactions that prevent proper curing. Stick with complete systems from a single product line whenever possible.
Finally, many DIY painters apply coats that are too thick, believing heavier coverage means fewer coats overall. Thick paint layers take exponentially longer to dry, sag on vertical surfaces, and are more prone to cracking as they cure. Multiple thin coats always outperform fewer thick coats. If you can see brush marks or texture immediately after application, you’ve applied too much paint. The proper technique involves working the paint out until it appears almost too thin, then allowing it to level naturally. If you find yourself struggling with technique despite following proper procedures, professional cabinet refinishing services can deliver the results you’re envisioning without the learning curve and risk of material waste.